
Introduction
In this tutorial, I’m going to show you how you can create scheduled tasks (or cron jobs) in a Laravel application and easily monitor them. The monitoring tool will alert you if your task fails or doesn’t run on time.
A scheduled task is a task defined by you and runs by your server at a predefined time. When you run a web or mobile application you need to run some tasks in the background every so often. As an example, if you’re Medium you may want to send a daily or weekly digest with all the popular articles to the users who have subscribed to the digest. You do this with a scheduled task. If you’re running a SaaS application with a free trial you may want to send a reminder to all your trialists whose trial expires in 3 days. These tasks are usually scheduled tasks and need to be scheduled and run without your interference in the background. We can achieve this with Laravel’s task scheduling!
For each scheduled task running on your server, you need to generate a Cron entry. Crontab in your system contains the list of all the cron entries. Each cron entry is for one cron job. Lucky for us, Laravel provides a very expressive command scheduler and you will need to add only one cron entry to your server for all your scheduled task.
Now, let’s get started with creating and scheduling a task.
Creating a new task
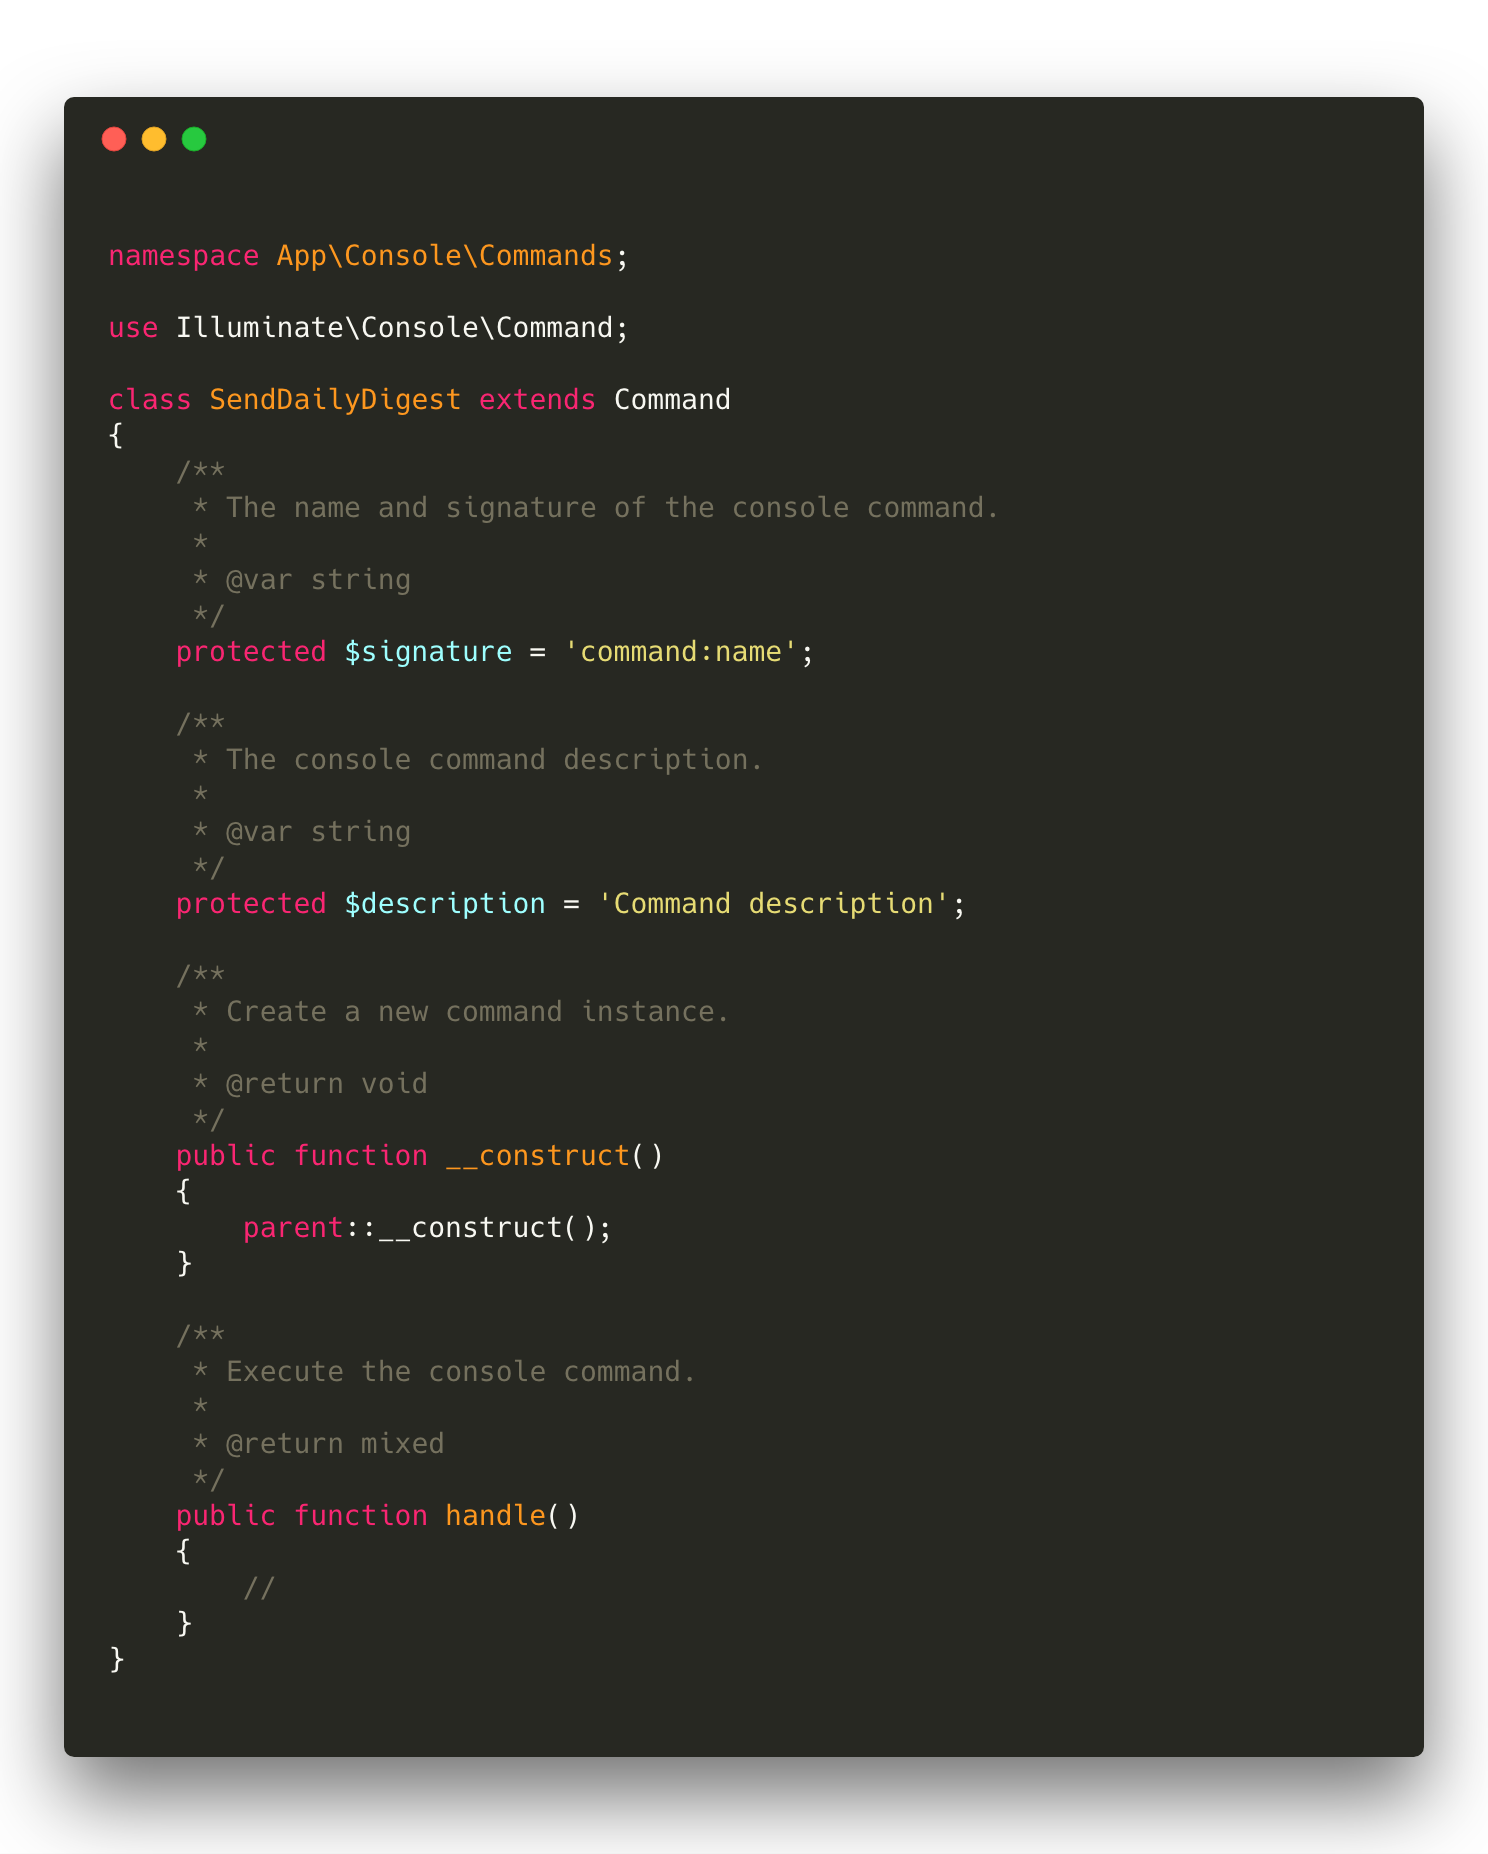
Our task is to send some kind of a daily digest to all our existing users. For that, we will generate a new artisan command called SendDailyDigest. We can create the artisan command by running the following:
php artisan make:command SendDailyDigest
All generated commands live in app/Console/Commands directory and our new command class looks like this:
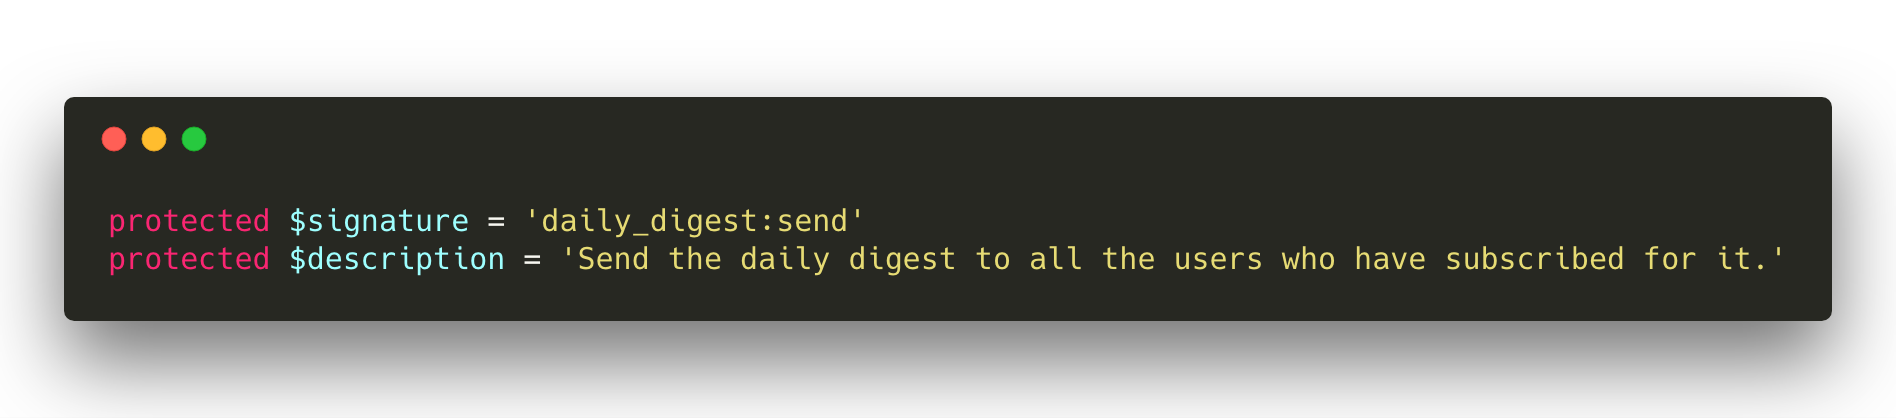
We should fill signature and description class variables with something meaningful so it’s easy to tell what each command does. The signature as the name tells is the name or identifier of the command and the description helps to provide more information about the command.We will change the signature and description properties:
Now running php artisan we can see that daily_digest:sendcommand is in the artisan command list. Running the command will call the handle() method so will place the logic of our command in this method. In our case, it will be iterating over all the users that are subscribed for the daily digest and emailing them the generated digest.
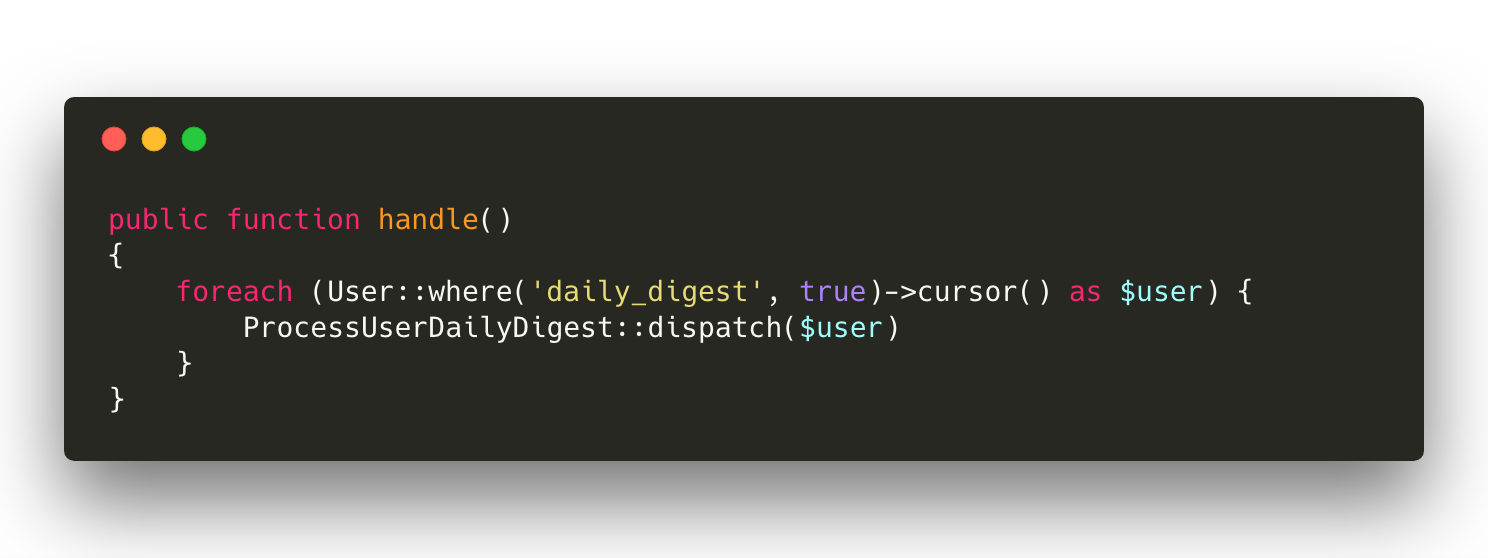
ProcessUserDailyDigest is a Job that takes care of sending the digest to the email. It’s up to you how you want to define it. The next step is scheduling this task so it can run every day with Laravel scheduler.
Scheduling the task
All task schedules are defined in app/Console/Kernel ‘s schedule method. Laravel scheduler provides a rich library to define the schedules in Laravel itself. This way we can define all the scheduled tasks in this method and create only one Cron entry for all of them.
Since we send our digest every day we can tell the scheduler to do so with everyDay()method.
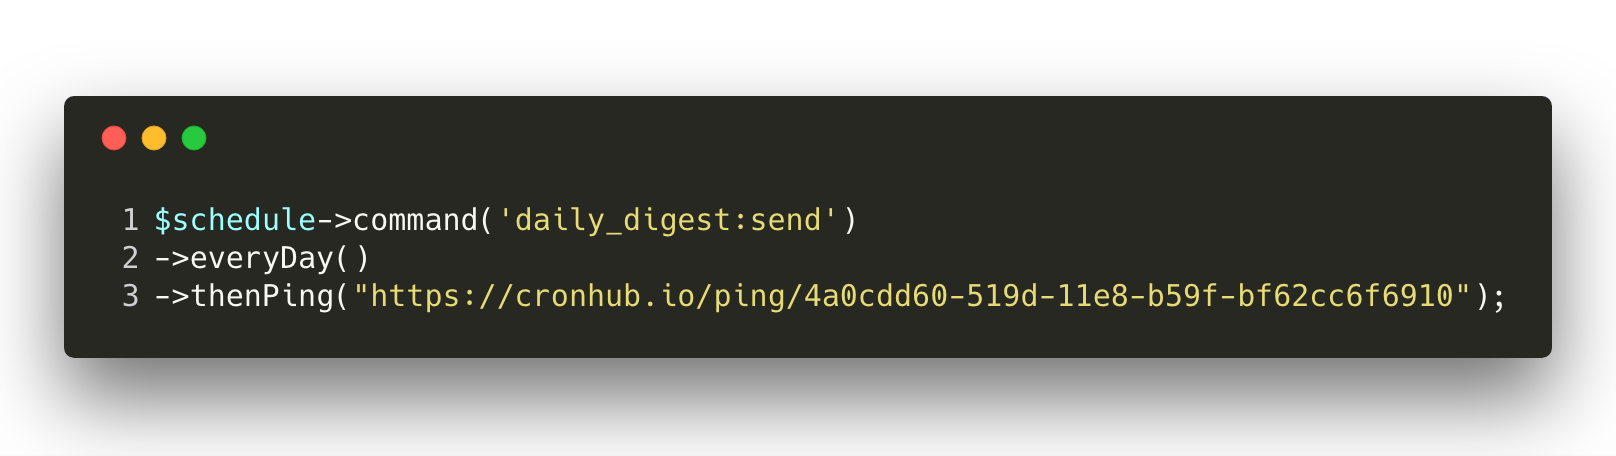
$schedule->command('daily_digest:send')->everyDay();
Starting the scheduler on your server
In order to start the scheduler we need to add a Cron entry to our server. All the entries live in a file called crontab. If you ssh to your server and run crontab -l you will see the content of the crontab. Usually it will be empty unless you already have cron jobs defined on your server. If we want to add a new Cron entry we should edit the file and add a new entry.
Running crontab -e will open up the file in the editor. Then, we can add this entry to the file:
* * * * * php /path-to-your-project/artisan schedule:run >> /dev/null 2>&1
What this Cron entry does it calls Laravel’s command scheduler every minute and runs all the scheduled tasks that are due to run. Again, all the scheduled tasks are defined in app/Console/Kernel ‘s schedule method.
The last step that we want to do is to setup an easy monitoring tool to monitor our cron job. I’ve created a free cron monitoring tool just for this purpose. Cronhub monitors your cron jobs and alerts you when any of your jobs fail or don’t run on time. This is important when you have crucial scheduled tasks and want to make sure they successfully run on time.
Monitoring your task with Cronhub
You will need to create a Cronhub account to monitor your cron job.

Cronhub has a free plan that allows you to monitor two cron jobs and get notifications via email or Slack. After signing up, you will see a default monitor already created for you. Click on it and then edit the monitor with your cron schedule and notification channels.
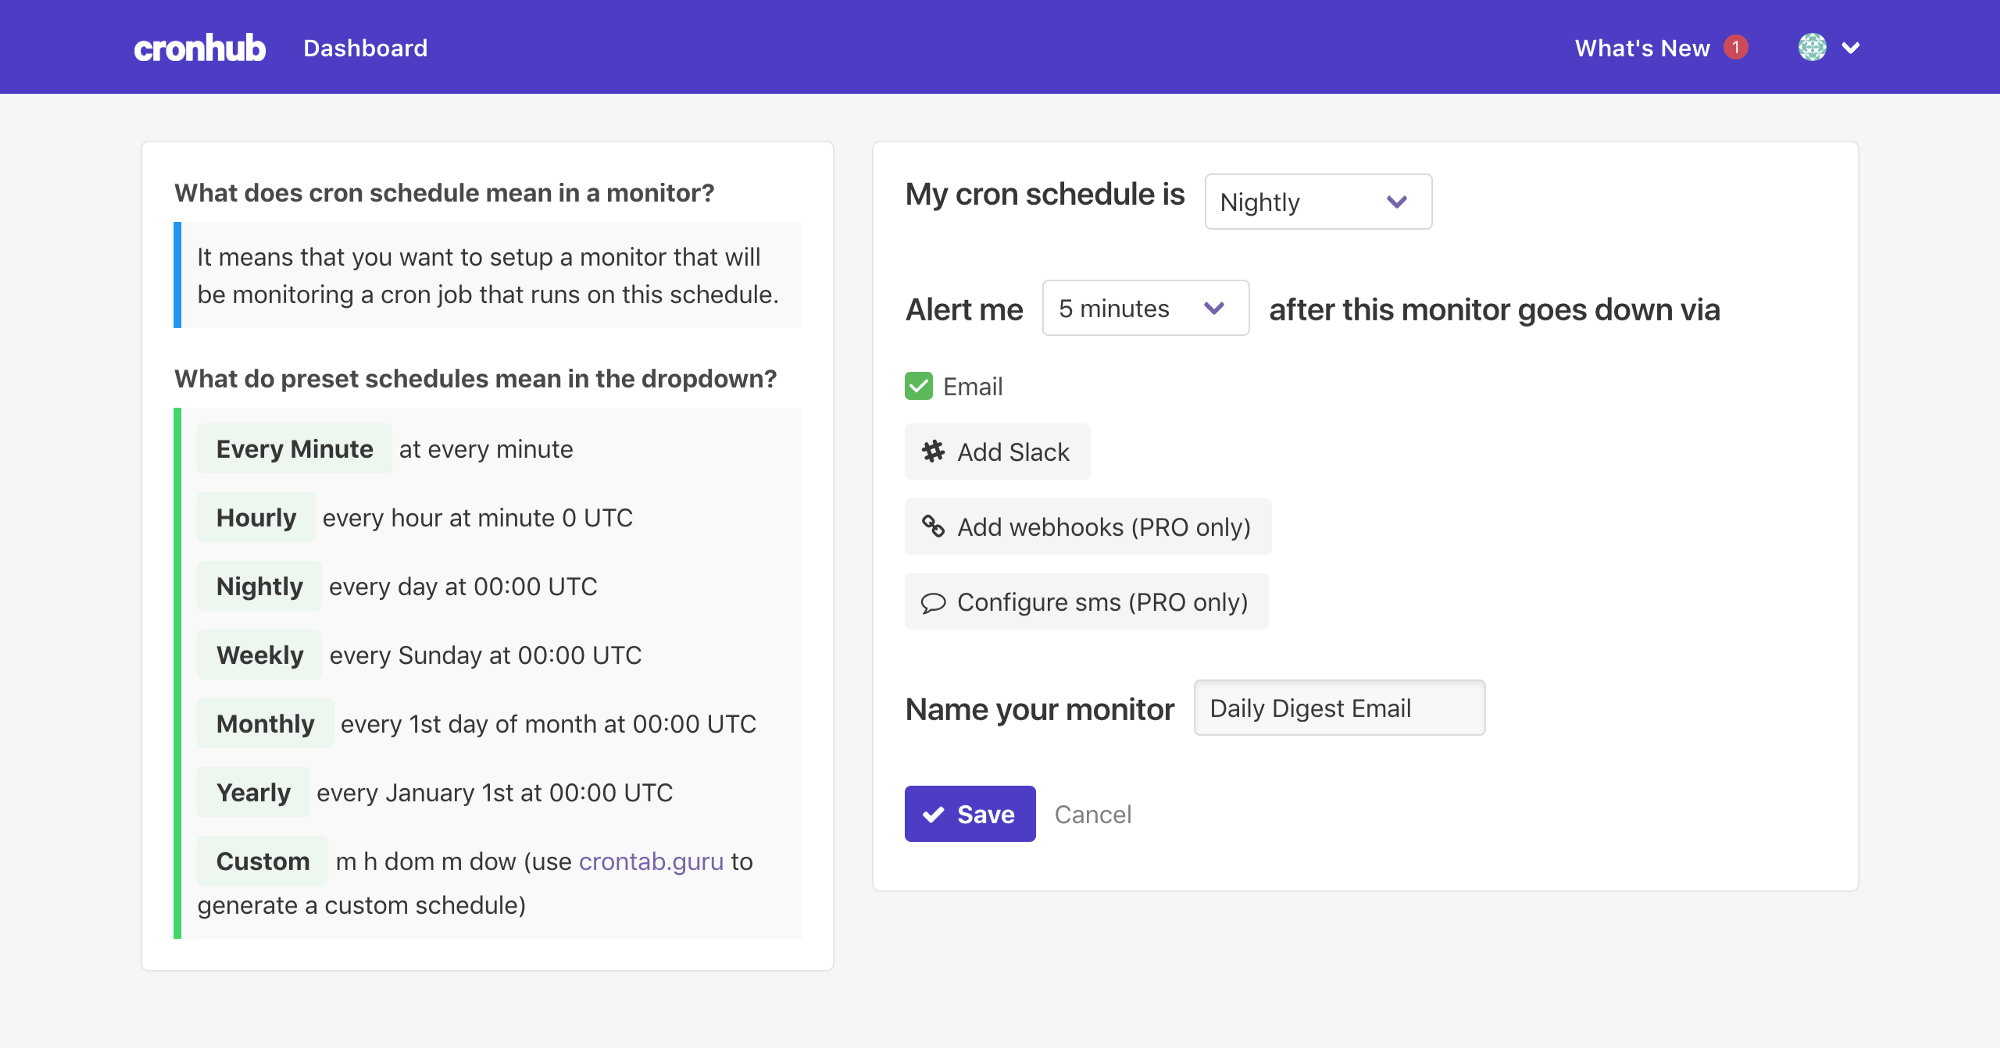
Set the monitor schedule to “Nightly” and the grace period to 5 minutes. After saving the monitor you will get a unique URL which you will need to ping to every time your Laravel task runs.
After the monitor is created we need to set up the scheduled task with the Cronhub monitor. Laravel provides thenPing(url) method which we can use to tell our scheduled task to ping to the monitor URL after it has finished running the task.
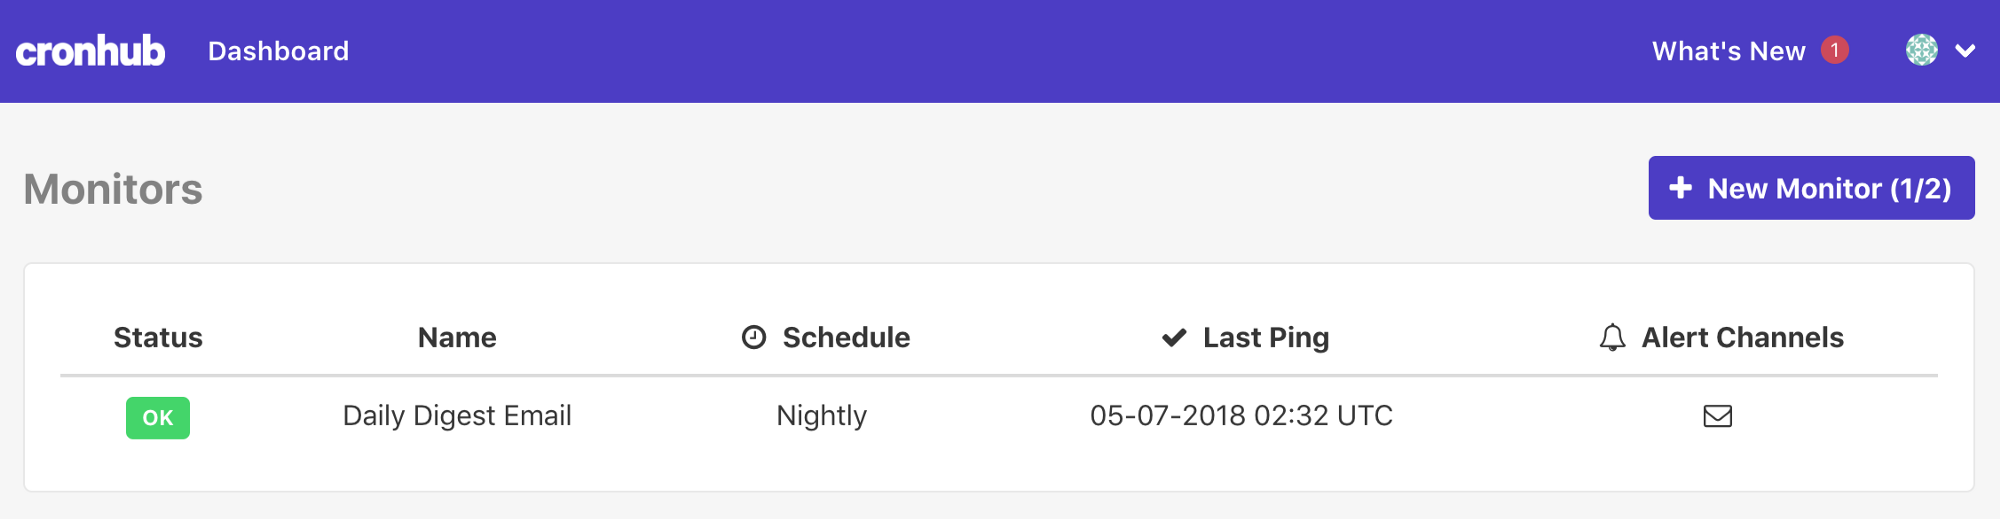
After the first run and ping to your monitor Cronhub will continue monitoring your task and will notify you if anything goes wrong with your task.
Now you know how you can create a new scheduled task in a Laravel application and set up a simple monitoring around it. I hope this guide was useful.
If you’re a developer or part of a developer team that uses cron jobs, you can try Cronhub for free. It’s my side-project and I’d love your feedback and suggestions!